This is the layout I taught at Studio J Boot Camp!

Watch my tutorials to learn these techniques or schedule a one-on-one Studio J session with me.

There are so many benefits to memory keeping the Studio J way!

I love that Studio J allows us unlimited My Stickease and embellishments. We can even resize them...can't do that with our classic supplies.

Use Studio J to create hybrid pages.

Let me show you how to dress up a Studio J page with a little bling! I added Bitty Sparkles to this page.

Let your creativity shine with Studio J!

Take my face-to-face classes or watch my video tutorials to learn advanced Studio J techniques such as creating your own background paper using text boxes.

Studio J is your best friend if you are short on time.

Drop in your photos, color the toggle accents, add a title and journaling, print...it really is that easy! Let me show you how.

Friday, March 30, 2012

Expand the Possibilities in Studio J

From the very beginning of my love affair with Studio J, I knew I was getting a screaming deal on photo enlargements.  I very rarely made enlargements in my classic scrapbooking due to the need to pre-plan my layouts and the time/money involved in actually obtaining the enlargements.  Studio J makes it so easy to really showcase my favorite photos.  I simply drop the photo into a well and it automatically resizes; it seriously doesn't get easier than that!  I can even rotate the page and the photo will automatically rotate along with it.  That in and of itself gives me so many layout options.  Yet,  Studio J allows me to expand the possibilities even more by dropping one photo into multiple wells to create super sized photos.  I wrote about it in my Why I'm Thankful for Studio J #28 post and added photos, but I think this video tutorial does much more justice to this awesome technique.

Sunday, March 25, 2012

Celebrate March with Buy 2 Get 1 FREE!

In addition to launching my new website, I’ve added some fabulous members to my team this month, so I am in a celebratory mood.  I want to celebrate March by offering you a special found only on my website.  Buy 2 stamp sets using this link, and I will send you another stamp set of equal or lesser value for FREE! 

You only have a week to take advantage of this special, so don't delay.  You must also follow these instructions to receive your FREE stamp sets directly from me:

1)  Place an order on my website for 2 or more stamp sets.  No Limits!  For every 2 stamps you order, you will qualify to receive 1 free from me!

2)  Email me to let me know which stamp set(s) you would like for FREE.  They must be of equal or lesser value than the stamps you purchased on my website.  Do not place the free set in your cart or you will be charged for it and I can't alter your order once it is placed on my website.

3)  I will send you your free stamp set(s) in a separate order!  Please remember that this offer is only available through Amy Ulen and is not a Close To My Heart corporate special.  This is just me sending my love back out to all you awesome crafters!

Now, a free stamp set is nice, but a FREE Art Philosophy Cricut Collection is even better!  When you sign up to become a consultant before March 31st, CTMH will give you the added bonus of a FREE Art Philosophy Collection or a $100 shopping spree!  There has never been a better time to join my Studio Scrapping team.

Just think, you could buy a full year membership to Studio J with that $100 shopping spree!

Both of these deals expire at 11:59pm MT on March 31st, so act fast!


Monday, March 12, 2012

What I learned from Stacy Julian today.


When signing up for Stacy Julian’s Twelve at Big Picture Classes, I was excited and apprehensive about the prospect of taking 12 photos on the 12th of each month during the year 2012.  My doubt stemmed from the fact that my life is really boring.  Trust me, this is not a complaint…I love my life!  The problem is that I’m a homebody; other than work, I don’t get out much.  So, I simply couldn’t imagine that my 12 photos were going to be very interesting.  Yet, amazingly, each day has given me memories I’m looking forward to recording.  For instance, school was released at 10am today because we didn’t have power after the wind storms last night.  That meant that I was free to attend Stacy’s chat this afternoon!

During the chat, one of my classmates asked a question regarding the use of templates or sketches.  The text moved by too quickly, so I didn’t read the entire thing, but it sounded like she may feel a little guilty about using these tools.  Stacy and several of the other participants chimed in with some great analogies.
Stacy likened the use of sketches to using sheet music.  Sheet music provides musicians with the foundation they need until they can compose their own music.  Some musicians never get to that point, and that is okay, too.  The other analogy was that of a cook.  We don’t criticize or look down on cooks for using recipes.  We certainly don’t expect them to become accomplished chefs that can create a delicious meal without a recipe.  So, why do we put so much pressure on ourselves as scrapbookers?

This is one of the things that I love best about Close To MyHeartJeanette’s How-To Books lay out the patterns and tell me how to cut my papers.  She gives us helpful tips along the way and beautiful art that I can scraplift or modify as needed to tell my story.  None of my family members are going to care that I scraplifted the page; in fact, they probably won’t ever know unless I tell them.  It simply isn’t an issue for them.

Now, the one sad thing is that CTMH is discontinuing the How-To Program, and once the books are sold out, they are gone.  If you haven’t picked up your copies, I wouldn’t hesitate.  One of our last updates said that some of the books may be sold out as early as this month.  L

I am a proud scraplifter and embrace that it is part of my process.  Scraplifting and using sketches helps me complete pages because I don’t have to think too much.  It also teaches me new techniques that I can apply to my other projects.  In case you missed it the first time, I’m posting my Confessions of a Scraplifter tutorial.  


After I first posted this, I received a long note from a gal who was trying to build me up and tell me how creative I am.  I do appreciate her kindness, but I think she missed the point.  So many people use the excuse of “I’m not creative enough” as the reason why they don’t scrapbook.  Our great How-To Programs and Studio J have creativity built into them.  I never stress about it.  Instead, I get to focus on preserving my favorite memories and photos!

Now, if you asked me to cook or play an instrument…that would stress me out!

Saturday, March 10, 2012

Studio J JPGs Meet the Memory Game!

As a Studio J member, I receive free JPG images of all my purchased layouts.  I've had lots of people ask me what I do with those JPG images, so here are a few ideas:

1)  One of the best things you can do with the JPGs is burn them onto a CD or DVD and place in a fireproof safe to archive your photos/layouts.

2)  Facebook, blog, tweet or email the web friendly JPG image to share with your friends and family.

3)  Make additional copies of your JPGs at your local photo developer or drop the image back into Studio J's "No Limits" layout.  This is good for those layouts that are older than a year since CTMH only archives them for a year.

4)  My favorite use of the JPGs is creating mini-albums and 3-D gift items!
Here is an example of one of my recent projects using the My Creations Memory Game.  To decorate the outside of the box, I inked the edges with Bamboo and cut the Footloose paper to size.  I used Bonding Memories Glue to adhere the paper making sure I got right up to the edges.

Decorating this box was so much fun!  I brought images from the Art Philosophy Collection into the Cricut Craft Room to weld my 2011 together, modify the shapes of the stars to look like starfish, and create the little circles to be used with the Vintage Type stamp set.  I used 3-D Foam Tape to add a little dimension and Liquid Glass to make sure my Wooden Designer Buttons and Baker's Twine didn't move.  This little box seriously makes me happy, but then I open it up and it gets even better!


Since it will be easier to demonstrate this technique using Photoshop, I'll upload a video later.  In short, I resized my JPGs to fit the 3x3 coasters in the game box.  I also stamped the backs of the coasters with the Universal Backgrounds stamp in Creme Brulee and used the My Legacy Writers to add journaling about each layout.

Monday, March 5, 2012

Studio J Tutorial #19--3D Text


Although I've been encouraged by my awesome upline, Carol Thompson, to apply to teach at Close To My Heart's Extravaganza at Convention, I've never had the courage to do it.  I didn't feel I had anything to offer since I have always been a scraplifter.  Don't get me wrong, I'm totally okay with that and don't feel bad at all about my lack of creativity.  In fact, that is one of the things I love the most about Close To My Heart.  They make it so easy for us all to look amazingly creative to our friends and family.  In the greater scheme of our lives, that's all that really matters.

Yet, then I fell in love with Studio J and started making training videos.  This prompted CTMH to invite me to teach at the Studio J Boot Camp!  It was such an amazing experience and finally gave me the confidence to apply for Extravaganza this year.  Over the next couple of weeks, I'll share my projects along with some video tutorials.  I love my projects so much that it was really hard to say good-bye to them.  I have to wait until July to get them back if I'm not selected to teach...I think the waiting will be more of a disappointment than not being selected.  LOL!

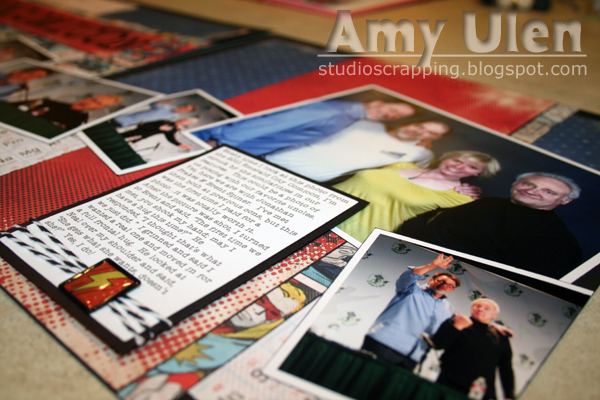
I'm really sorry this isn't a better photo, because this layout looks fantastic in person.  I had been thinking about this layout ever since I took these photos of my husband and his friend playing Combat Commander.  It is a hybrid layout that I designed in Studio J.
I had always planned to add the word Combat later, so I designed the rest in Studio J.  This is what the original file looked like.  I then removed the brads and changed the stitching to match the background paper since my plan was to add my own stitching and embellishments.

I did order both copies of the layout, because I knew that I was cutting out an image and adding stitching.  I wanted a backup, just in case!  Once I received this plain copy, I set to work!

I also had fun discovering a new 3D title technique that I share in the video tutorial above.

I cut the map out and added a 4x6 Flip Flap to make room for more journaling.  It makes me happy that I can tell the story I want to tell without worrying about taking up too much room on the page.  
Flip Flaps Rock! 

I cut "Combat" out using Art Philosophy and easily mounted the letters to dimensional elements.  Love how easy our Cricut cartridge and coordinating dimensional elements make creating titles and other embellishments.

My husband gave me a few game pieces from Advanced Squad Leader to embellish the page!  He was worried that people would notice that the markers are from two different games...really?!  LOL...I just wanted colors that would match the layout!

I added stitching, brads, and game pieces to give the page dimension.  


Saturday, March 3, 2012

Gearing Up for Emerald City Comicon 2012


I'm the first to admit that I'm a big geek and one of my passions is Star Trek.  I attend as many conventions as possible and am determined to get my photo taken with all my favorite actors.  As you may imagine, I have a LOT of scrapbook pages devoted to Star Trek; so much so that my friends call me a techno-scrapper!    


I was inspired to create this layout because the 2012 Emerald City Comicon is one month from today, and, yes, I already have my ticket.  I took these photos of Jonathan Frakes & Brent Spiner at last year's ECCC. The Superhero paper is a perfect fit for Comicon, and I matted all my photos with white daisy cardstock to mimic the look of comic frames. I used the Showtime pattern from Magic and swapped the pages to create the EC*Comicon 2011 title.

 It has been awhile since I embossed anything, so I pulled out the craft heater, black embossing powder, and the Hero Alphabet to create my title.  I also used the Art Philosophy cartridge and Dimensional Elements Numbers to create the date.  I really appreciate that CTMH prints the size to set the Cricut directly on the packaging for the dimensional elements (and stamp sets).  It makes it so easy to cut the perfect size every time!


I popped up the photos and journaling block and wrapped our new Baker's Twine around them...I love this stuff! I had fun finishing off the look with a couple of the Comic Badge Buttons.

I'm applying to teach at Convention this year, and I almost didn't want to send this layout because I wanted to keep looking at it.  I will get it back, but, if I don't get selected, I won't see it again until July!  I wish these photos were better.  Oh well.


Here is my journaling:

"Every time I look at this photo from the 2011 Emerald City Comicon, I’m struck by the similarities in our features.  This could be a photo of us posing with our favorite uncles.  Yet, here we are with Jonathan Frakes & Brent Spiner.  I’ve met them both at previous cons, but this was the first time I paid for a photoit was totally worth it.  After the picture was shot, I turned to Brent and said, “The first time we met, you shook my hand; may I have a hug this time?”  He responded, “I thought that’s what we just did.”  I grinned and said I wanted a real one and moved in for a full frontal hug.  He looked at Neal over my shoulder and said, “She gets what she wants, doesn’t she?”  Yes, I do!"

Seriously, doesn't it look like they could be our uncles?!

Related Posts Plugin for WordPress, Blogger...
Twitter Delicious Facebook Digg Stumbleupon Favorites More